Tired of replacing batteries all the time? Learn how to convert your old battery-powered remote into a rechargeable one with this budget-friendly, eco-conscious project.
Introduction: The Hidden Cost of Batteries in Everyday Life
Have you ever been ready to relax with your favorite movie, only to realize the remote isn’t working? Dead batteries have a way of showing up at the worst moments. Whether it’s for your TV, fan, game controller, or kid’s toy, battery replacements seem endless—and so does the cost.
Most households spend tens to hundreds of dollars a year on disposable batteries. Beyond the financial hit, the environmental impact is just as alarming. According to the Environmental Protection Agency (EPA), billions of batteries are sold in the U.S. each year, and many end up in landfills. But what if you could cut down your expenses and your carbon footprint with one simple solution?
The Game-Changer: Make Your Battery-Operated Devices Rechargeable
This easy home improvement idea involves modifying your remote (or any small battery-powered device) to include a rechargeable lithium battery and a USB charging port. It’s an efficient solution that’s surprisingly simple and affordable to build, even if you’re a beginner.
The best part? Once it’s done, you can stop buying new batteries altogether.
What You’ll Need for the DIY Rechargeable Remote Project

Before diving into the steps, gather the following components. These are commonly available online or at your local electronics store.
✅ Basic Components:
-
Lithium-Ion Rechargeable Battery (3.7V 14500)
The 14500 battery is similar in size to a standard AA battery but can be recharged via USB. Make sure you get one with built-in protection circuitry. -
TP4056 USB Charging Module (with protection circuit)
This small charging board allows you to recharge your lithium battery using a micro-USB or USB-C cable. Many come with built-in overcharge and discharge protection. -
1N4007 Diode
This component helps prevent reverse current flow, protecting both your battery and the charging module. -
Small Switch (optional)
To completely cut power when not in use—useful for preserving battery life. -
Basic Soldering Kit
Includes a soldering iron, wire cutters, solder, and possibly heat shrink tubing. -
Dremel Tool or Drill
To make a small hole in your remote’s casing for the USB charging port.
🔧 Tip: If you’re new to soldering, you can find tutorials on YouTube or websites like Adafruit and Instructables.
Step-by-Step Guide: How to Build a Rechargeable Remote

1. Open Your Remote
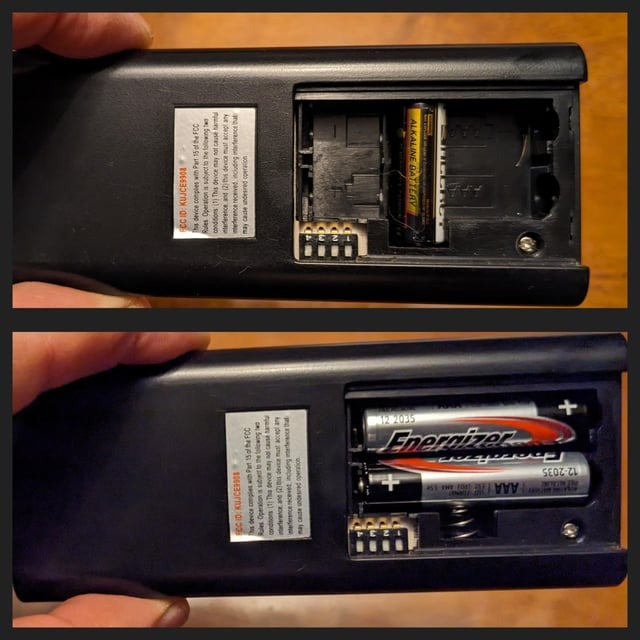
Use a small screwdriver or pry tool to carefully open the casing of your remote. Identify where the battery terminals are—these are typically labeled as “+” and “-“.
2. Remove the Battery Holder (If Necessary)
Depending on your remote’s design, you may need to remove the spring terminals that previously held AA or AAA batteries. Leave enough space for your rechargeable battery to fit inside.
3. Solder the Rechargeable Battery
Solder the red wire (positive) from the 14500 battery to the “+” terminal, and the black wire (negative) to the “-” terminal on the remote’s PCB. Be careful not to short any components.
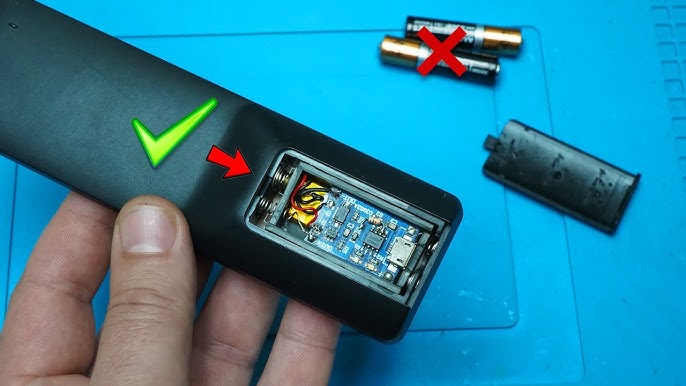
4. Install the Charging Circuit
Solder the TP4056 module:
-
BAT+ to the battery’s positive
-
BAT− to the battery’s negative
Then, connect your USB cable to the TP4056 input (IN+ and IN−). Add a diode between the battery and the device to protect against backflow current.
5. Mount the USB Port
Use a Dremel or small drill to create a hole in the back or side of the remote. Carefully glue or mount the charging module so the USB port is accessible.
6. Close the Case
Reassemble the remote carefully, ensuring that the new battery and module fit snugly. If it doesn’t fit perfectly, consider using a slightly larger remote or redesign the casing with a 3D-printed shell.
7. Charge and Test
Plug in a USB cable to test charging. A small red light on the TP4056 will usually indicate charging; it turns blue or green when full.
Optional Advanced Add-On: Add Bluetooth or Wi-Fi
If you’re comfortable with microcontrollers, consider upgrading your remote with an ESP32 chip. This enables:
-
Bluetooth or Wi-Fi control
-
Custom firmware
-
Remote diagnostics or programming
This step requires additional programming knowledge and tools like Arduino IDE, but it opens up countless customization options for smart homes.
Why This DIY Project Is a Win-Win
✅ Eco-Friendly
Every rechargeable battery saves dozens—if not hundreds—of disposable ones from ending up in landfills. According to the Battery Council International, a single rechargeable battery can replace up to 1,000 disposable batteries over its lifetime.
✅ Saves Money
A TP4056 module and a 14500 battery cost around $3–$5 total, far less than the repeated cost of buying batteries. You’ll recoup your investment within a few months, especially in households with multiple battery-operated devices.
✅ More Reliable
Never again worry about running out of batteries mid-movie or during an important presentation. You can recharge overnight and have your device ready the next day.
✅ Fun and Educational
This is a fantastic weekend project for adults and teens alike. It teaches the basics of electronics, energy efficiency, and gives you a working device that you actually use.
Safety Considerations
While this DIY is beginner-friendly, it’s important to follow safety guidelines:
-
Never puncture or short a lithium battery.
-
Ensure you’re using a TP4056 with built-in protection.
-
Use proper insulation around all wires.
-
Don’t leave charging unattended the first few times you test.
If you feel unsure at any step, consult an electronics-savvy friend or professional.
Can You Use This Hack on Other Devices?
Absolutely! Many small electronics powered by AA or AAA batteries can be modified with a similar setup. This includes:
-
Remote-controlled toys
-
Flashlights
-
Wireless game controllers
-
Portable radios
However, be sure to check the voltage and current requirements. Not all circuits are compatible with 3.7V lithium batteries.
A Small Hack That Makes a Big Impact
With just a few components and a bit of curiosity, you can transform your old remote into a rechargeable, eco-conscious gadget. It’s a creative way to reduce waste, save money, and learn about basic electronics.
And best of all? No more last-minute trips to the store for batteries.